Gradle, Spring Boot, and packaging executable “jar”

To build and run a project artifact:


$ gradle build
$ java -jar build/libs/mymodule-0.0.1-SNAPSHOT.jar

NOTE: if you use a Windows machine, you must check you have installed “gradle” executable and “jdk”. Of course “bin” directories of these installations must be included in “Path” environment variable.

Create a Gradle project using Spring Tool Suite

In order to create a new gradle + Spring framework project:

(1) Download and install the gradle eclipse plug-in (https://marketplace.eclipse.org/content/gradle-integration-eclipse-44)

(2) Create “New Spring Starter Project” and select “Gradle Project”
Untitled


(3) Click “Finish” after filling the form


Add a new keypair and boot a new instance

You can create a new key pair by

$ nova keypair-add your_key_name

After creating it, you can see the key on your screen.


-----BEGIN RSA PRIVATE KEY-----
MIIEowIBAAKCAQEA3cHMlhPt0gU5yg1J5pqzwcwOfJGz/jr3k0/BaHGbukf4E5Xg
1fLyE8GqpEfTNqiInDyQDLFVidHaH0S5EeVc0888RLhlNYxriCDesRNXtzF1yBin
a040HTRC1WbCt0VwZbPZ3IpWcgkRYIVjkCkBEGO5W2ROaPeZYxn69pVyiuk9GTtV
Gd4U0XD7bkSx6sCOCT9YTD2xL4k5CL5IeEKFlXzyD++9C7bZ+q7OeKz0D/FND4UL
gmA6i4u563+hhM/2xX/lbuSEh+OzCye/u7c2xHvpo2Pgzn0BcygcYO6OZOOXzOb
.....

Copy this and create a new “.pem” file like your_key_name.pem.

Now the private key is ready to let you access your instance via SSH without the password authentication.

To launch a new instance, you need to download an OS image. For me I downloaded Ubuntu server 12.04 from http://cloud-images.ubuntu.com/precise/, and registered it (see this guide).

Run this command:
$ nova boot --flavor your_flavor_name --image your_OS_image_name --security-groups default --key-name your_key_name your_server_name

Use the OpenStack command line tool

You can use the command line tool to control your OpenStack without Horizon (the web OpenStack dashboard).

This approach can provide you a great flexibility to develop your cloud applications. For example, you can launch and terminate your instance without human intervention.

(Of course, you can use other API tools such as jClouds. However, should try command line tools before using these for your better understanding.)

In order to use the command line tool, you must be authenticated as a tenant by putting your credential in your environmental variable.

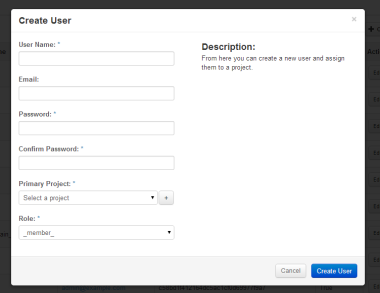
(1) You should create a new user, if needed. You can do this using Horizon. (Admin -> Identity Panel -> Users, Note: different Horizon version might have a different location to add a new user.)

Image

(2) You need to run:

$ source openrc your_user_id your_project_name

For my case, I added this command into “rejoin-stack.sh” script.

Now you can use the command line tool.

For example, you can type:

$ nova-manage flavor list

The result would show instance flavors like:

$ nova-manage flavor list
m1.medium: Memory: 4096MB, VCPUS: 2, Root: 40GB, Ephemeral: 0Gb, FlavorID: 3, Swap: 0MB, RXTX Factor: 1.0, public, ExtraSpecs {}
m1.tiny: Memory: 512MB, VCPUS: 1, Root: 1GB, Ephemeral: 0Gb, FlavorID: 1, Swap: 0MB, RXTX Factor: 1.0, public, ExtraSpecs {}
m1.large: Memory: 8192MB, VCPUS: 4, Root: 80GB, Ephemeral: 0Gb, FlavorID: 4, Swap: 0MB, RXTX Factor: 1.0, public, ExtraSpecs {}
......

If you can see a list of flavors, this means that you can use the command line tool.

Otherwise, when running “nova” command, you possibly see this message:

ERROR (CommandError): You must provide a username or user id via --os-username, --os-user-id, env[OS_USERNAME] or env[OS_USER_ID]

You can fix this error to edit variable values in “openrc(http://devstack.org/openrc.html)” permanently.

#admin must be replaced to a tenant name (project name).
export OS_TENANT_NAME=${OS_TENANT_NAME:-admin}
#"yong" must be replaced to your user ID.
export OS_USERNAME=${OS_USERNAME:-yong}
#"password" must be replaced to your admin password.
export OS_PASSWORD=${ADMIN_PASSWORD:-password}
#"192.168.1.1"  must be replaced to your host IP address.
HOST_IP=${HOST_IP:-192.168.1.1}

Try this “nova list”, and you should see a running instance list such as:

+--------------------------------------+---------------+--------+------------+-------------+--------------------+
| ID | Name | Status | Task State | Power State | Networks |
+--------------------------------------+---------------+--------+------------+-------------+--------------------+
| c51df836-d8d1-40a2-b0a4-6ff44c8da487 | Ubuntu Server | ACTIVE | - | Running | private=10.11.12.2 |
+--------------------------------------+---------------+--------+------------+-------------+--------------------+


Rejoining DevStack

It is just easy to install DevStack, if you follow the instruction on the web site. (http://devstack.org/) (Just don’t forget adding a new user “stack” with NOPASSWD option, and must login as “stack”.) Even you can run your DevStack on any VM (e.g. VirtualBox), but just be careful to reboot. Image Some services are not automatically restarted. You possibly cannot login to the Horizon dashboard after rebooting. To restart these services you should run:

stack@yong-VirtualBox:~/devstack$ ./rejoin-stack.sh

Welcome

I am:

  • A software engineer.
  • 10+ years of work experiences with various tech skills such as web/native applications, client/server solutions, IT management, and so on.
  • An expert in virtualization technologies for web services via SOA + REST and SOAP with Zend Framework + jQueryMobile + MySQL + Linux Servers + JAVA + HTML5 with CSS3 + Cloud infrastructures like Amazon EC2.
  • My current research interests are virtualization technologies and cloud infrastructures with Xen to support real-time systems such as medical applications with sensor based body monitoring system for handheld devices.
  • Currently developing SaaS solutions for healthcare clinics, which is a medical chart application for various tablets connected through Wi-Fi or cellular networks, and deployed in Amazon EC2 with multiple instances.
  • A founder and project lead of “ZapThru.com” which is a smartphone and tablet food ordering system supporting REST interfaces as the open API stack for 3rd party developers and Point of Sale (POS) system integration.

Specialties:

  • Software development, project management, tablet/smartphone application, web application, virtualization technologies with VCPU scheduling, auto-scaling, and load-balancing technologies